


 Roll over image to zoom in
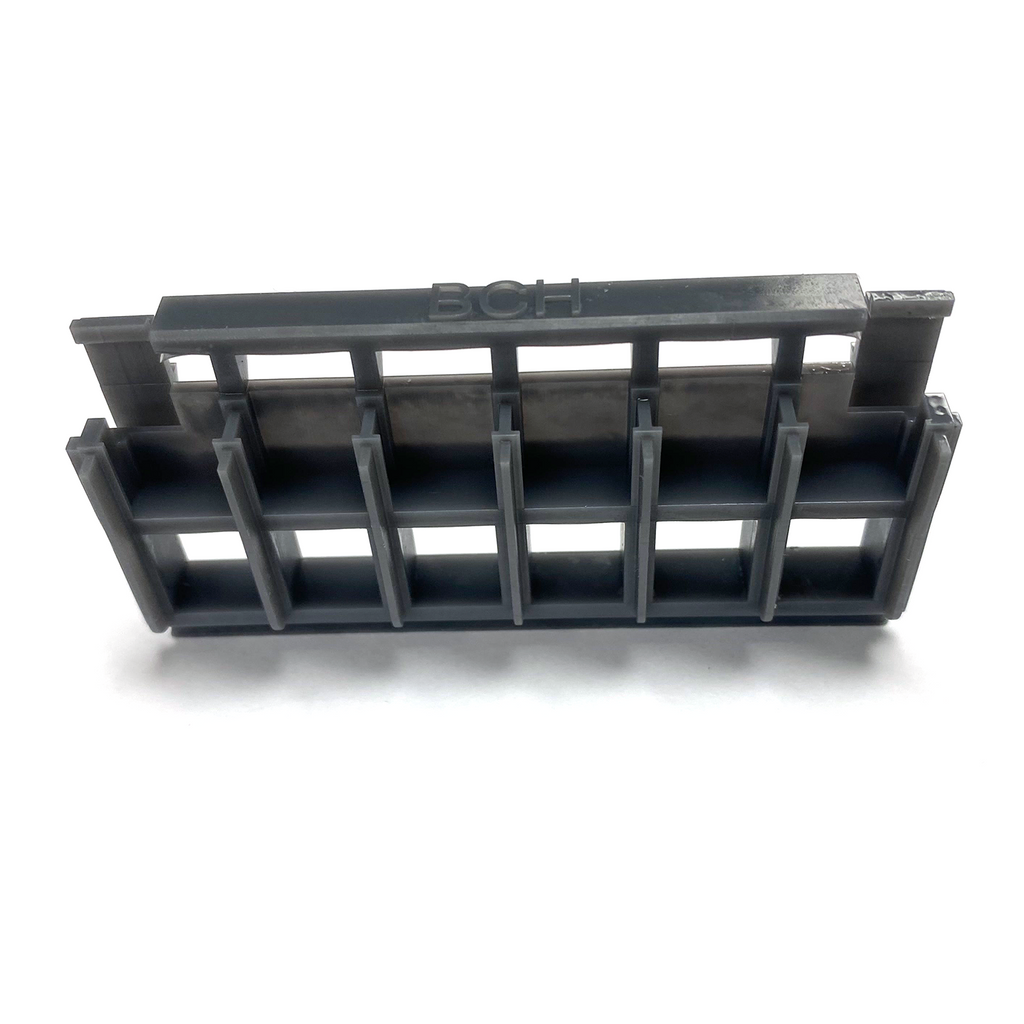
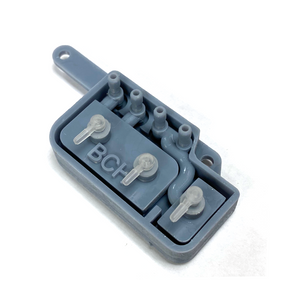
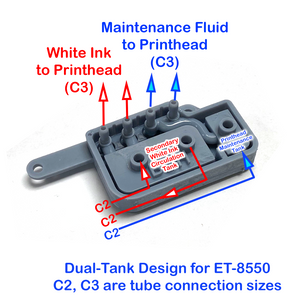
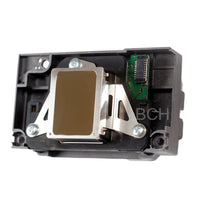
Damper Holder for Epson L1800/1390/1400/1410/1430/1500W Printers - Replaces CSIC Holder with Enhanced Design
Upgrade your Epson printer with this innovative Damper Holder, specifically designed to replace the CSIC holder in Epson L1800, 1390, 1400, 1410, 1430, and 1500W printers. Built for convenience and...
$15.99
Upgrade your Epson printer with this innovative Damper Holder, specifically designed to replace the CSIC holder in Epson L1800, 1390, 1400, 1410, 1430, and 1500W printers. Built for convenience and performance, this holder addresses the common challenges of the original CSIC holder while introducing practical enhancements to improve functionality.
Key Features:
-
Easy Removal with Front Finger Tabs
Unlike the original CSIC holder, which required special tools to access the rear tab, this design features two easy-to-use finger tabs positioned at the front, enabling quick and effortless removal. -
Stopping Bar for Proper Damper Alignment
The removal of the CSIC board in the old holder left large holes, causing dampers to be inserted too deeply and misaligned with the nipple below. This holder includes a built-in stopping bar, ensuring perfect alignment and preventing over-insertion. -
Enhanced Stability with Larger Wings
The damper cells in this holder are equipped with larger wings, offering improved stability and preventing dampers from shifting left or right during operation. This design ensures consistent and reliable performance. -
Wide Compatibility
Engineered to work with both color and white dampers, this holder is widely compatible, making it a versatile choice for various printing needs. -
Designed for Damper Use Only
This holder is not designed to accommodate the CSIC board and cannot hold or support the CSIC board. It is purpose-built for damper use, making it a specialized and efficient replacement for your printer.
Enhance your printer's functionality with this thoughtfully designed Damper Holder, combining ease of use, stability, and compatibility in a durable replacement solution. Perfect for ensuring smoother maintenance and superior printing performance.
Related products
Add your product to the cart to view shipping rates. We've delivered to 289,762 customers in 149 countries.

Sign up for our newsletter to get weekly coupons and tips on printer refills and repairs.
Got a question? Don't hesitate to email us at support@bchtechnologies.com
Subscribe to Kevin's YouTube channel for the latest tips on printer repair and maintenance.
Recently viewed


VERY VERY SUPER PRODUCT. I purchased this product from Kevin and I can always say that Kevin is the best. Kevin definitely creates the best videos on the web. He has the best products and I always buy from him. Kevin also always recommends the best methods. I always recommend buying BCH TECHNOLOGIES products to always have perfect printers.
Alessandro R.
Instruction Sheet for L1800 / 1390 Printhead Testing with Multimeter (Digital Download) Instant Download — Delivered to Your Email
Best thing ever!! i used to put cleaning solution in the capping station with a syringe/hose then had to suck out f the wast line with a syringe.... over and over until the capping station was clean. maybe up to 10 times. now i just use maybe 1 or 2 - 30ml syringes full of water and the pump cleans it out so good.... then I put capping solution, place printhead over capping station and turn on the back of the machine. thats it. when i print again, usually next day, I pull from waste tank a few times until I get ink, then i run 1 head cleaning , print a test strip and usually good to go. I sometimes print a 2nd test strip. SO MUCH easier to use this little pump. so glad I bought it.
Ruth F.
TMS Printhead Maintenance System by BCH: Comprehensive Cleaning and Maintenance Solution
This is a must have modification to save time troubleshooting. You will need to download Kevin's capping station video to disassemble the capping station. A definite must. You will also need a few other connections to hook this up. All parts are linked in his videos. Pro tip. Have patience and go slow. This modification will save you from a lot of headaches . I did this mod on Procolored L1800 about a year old . Thanks Kevin.
Vincent K.
Waste Ink Collection Tank Combo with Small Tube for Epson (AS-EP-WASTE-25MM)