


 Roll over image to zoom in
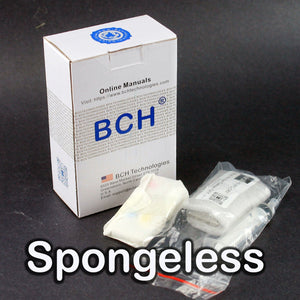
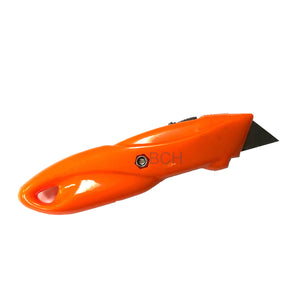
CBC260 Modification Kit for Making SPONGE Refillable Cartridge with Canon PG-240 CL-241, PG260 CL-261 (AS-SPG-CBC260)
With Large Sponge! Difficulty Level: 3 (Slightly Difficult) The process involves cutting with a sharp knife. This kit should be bought by experienced refillers. This kit can make Canon SPONGE...
$16.99
SKU:
AS-SPG-CBC260
Categories:
Tags:
With Large Sponge!
Difficulty Level: 3 (Slightly Difficult)
The process involves cutting with a sharp knife. This kit should be bought by experienced refillers.
This kit can make Canon SPONGE Refillable cartridges. The sponge cartridges have these advantages:
1. Larger volume: it takes more ink than XL. For example, if you have a starter or a regular cartridge, the modified cartridge can take the same amount of ink as a XL.
2. Refillable. Easy to refill.
3. Longer life. Cartridge lasts longer than regular refilled cartridges
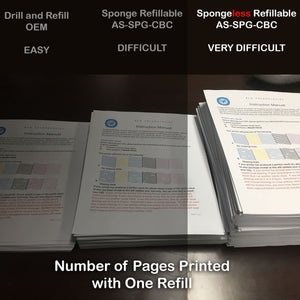
However, it doesn't last as long as a spongeless cartridge because of the sponge fatigue factor. Also, the ink volume is about half of the spongeless cartridge, so it will print fewer copies per refill. However, it is much easier to make than a spongeless cartridge. The unit is shipped with ink.
Package Content:
- 1 x Black sponge kit with ink
- 1 x Color sponge kit with ink
This is a Level-4 Project. Please read our Beta Tester's Tip before proceeding.
YouTube Instructions
1. How to make it (the video uses PG-245/CL246 as example but the procedure is the same for PG260/CL261)
Procedures:
1. Use a piece of saran wrap to cover up the printhead.
2. Find the seam between the cartridge and cover. Put the cartridge on the table and push the knife down on the seam. Use the middle of the blade as a pivot, tilt the knife up and down, work your way gradually and cut off the cover. The cover should come off quickly.
3) Insert the sponge converter.
4) For the first time usage, we need to remove air bubbles from the bottom of the printhead. Use a piece of paper towel to wrap around the cartridge and use a house vacuum hose to suck underneath, untill a significant amount of ink coming out. Or, you can use our suggested priming clip (not included): https://16wht3gau7.mybigcommerce.com//priming-clip-for-canon-pg-260-cl-261-ink-cartridges-and-spongless-240-241-as-pmclip-t260 to suck some ink out.
6) Turn off the ink gauge. The printer's ink indicator will not be accurate for refilled cartridges. Eventually, you will see the cartridge's LED light flashing; printer stops printing and claims there is no ink in the cartridge. Do not cancel the print, just press and hold the Stop button, which is a triangle sign. Hold it for 5 to 10 seconds, the printer will be back to work and will not track your cartridge's ink level anymore. You need to keep an eye on the print quality. In our experience, one refill lasts about 300 pages. Once you see the printout missing color, you can take the cartridge out and refill it. The printer will no longer bother you about ink level, and the cartridge lasts almost forever.
Things you will need (not included in the package):
1. A set of working cartridges
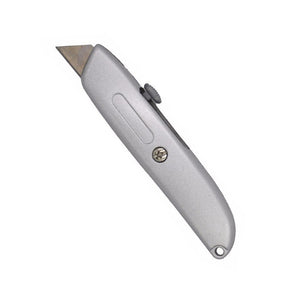
2. A sharp knife
4. A priming clip or house vacuum
Related products


Add your product to the cart to view shipping rates. We've delivered to 289,762 customers in 149 countries.

Sign up for our newsletter to get weekly coupons and tips on printer refills and repairs.
Got a question? Don't hesitate to email us at support@bchtechnologies.com
Subscribe to Kevin's YouTube channel for the latest tips on printer repair and maintenance.
Recently viewed


VERY VERY SUPER PRODUCT. I purchased this product from Kevin and I can always say that Kevin is the best. Kevin definitely creates the best videos on the web. He has the best products and I always buy from him. Kevin also always recommends the best methods. I always recommend buying BCH TECHNOLOGIES products to always have perfect printers.
Alessandro R.
Instruction Sheet for L1800 / 1390 Printhead Testing with Multimeter (Digital Download) Instant Download — Delivered to Your Email
Best thing ever!! i used to put cleaning solution in the capping station with a syringe/hose then had to suck out f the wast line with a syringe.... over and over until the capping station was clean. maybe up to 10 times. now i just use maybe 1 or 2 - 30ml syringes full of water and the pump cleans it out so good.... then I put capping solution, place printhead over capping station and turn on the back of the machine. thats it. when i print again, usually next day, I pull from waste tank a few times until I get ink, then i run 1 head cleaning , print a test strip and usually good to go. I sometimes print a 2nd test strip. SO MUCH easier to use this little pump. so glad I bought it.
Ruth F.
TMS Printhead Maintenance System by BCH: Comprehensive Cleaning and Maintenance Solution
This is a must have modification to save time troubleshooting. You will need to download Kevin's capping station video to disassemble the capping station. A definite must. You will also need a few other connections to hook this up. All parts are linked in his videos. Pro tip. Have patience and go slow. This modification will save you from a lot of headaches . I did this mod on Procolored L1800 about a year old . Thanks Kevin.
Vincent K.
Waste Ink Collection Tank Combo with Small Tube for Epson (AS-EP-WASTE-25MM)