

 Roll over image to zoom in
Instruction for Epson Stylus C88+ Printhead Install/Uninstall
Workflow sheet for install/uninstall printhead for Epson Stylus C88+ Series (C86, C88, C88+, and D88) Package include Video Instruction for Removal of External Casing Video Instruction for Removal and Replace...
$6.99
SKU:
Video-EP-C88-Printhead
Categories:
Tags:
Workflow sheet for install/uninstall printhead for Epson Stylus C88+ Series (C86, C88, C88+, and D88)
Package include
- Video Instruction for Removal of External Casing
- Video Instruction for Removal and Replace Printhead
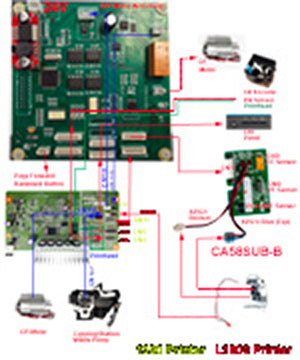
Epson C88 Printhead Replacement Guide. Follow these easy steps in the video to remove and replace your printhead:
- Using a small screwdriver, remove two screws to access the cover.
- Pry open the cover using a flat screwdriver, starting from one side and working your way around.
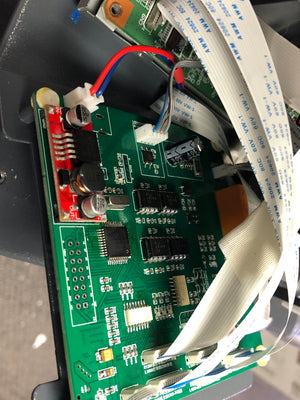
- Remove the cable cover and secure the tab to prevent it from sliding down.
- Remove the CSIC cable and board, if necessary, by punching and lifting it up.
- Remove the front frame by removing two screws and lifting off the rail.
- Remove the timing belt by holding it down, sliding to the right, and pulling it out.
- Release the two important tabs on the left and right to remove the printer carriage.
- Remove the cover to access the page width sensor and disconnect all cables.
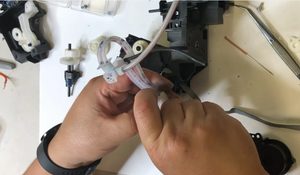
- Slide the new printhead in and secure the two tabs to stabilize the front rail.
- Reinstall the cable, page width sensor cover, and timing belt.
- Power on the printer and run a test.
- If the carriage does not move, check for twisted cables, incorrect rail placement, or incorrect cable connections.
Note: Do not separate the two cables when removing them and make sure to secure the tabs before inserting the printhead. The PW sensor cover can be left off until the cables are connected.
Delivery: instant delivery digital product (if ordered alone).
If you didn't order other products from our store, then digital files will become immediately available for you to download. You will get a link to download their files after completing payment, and will receive an email with a download link too.
If you order other products from our store, it will have to be manually set to Completed before you are given the download link. Therefore, please order this digital product seperately from other things. There is no shipping or handling charges on digital product, so you are paying the same no matter you order alone, or with other products.
All digital product has to be downloaded within 30 days.
Related products


Add your product to the cart to view shipping rates. We've delivered to 289,762 customers in 149 countries.

Sign up for our newsletter to get weekly coupons and tips on printer refills and repairs.
Got a question? Don't hesitate to email us at support@bchtechnologies.com
Subscribe to Kevin's YouTube channel for the latest tips on printer repair and maintenance.
Recently viewed


33%


I had an issue with an Epson printer where it would not work at all, gave an error code and I couldn't find out what it meant and Epson wanted me to take the printer to one of their repair facilities and pay $99 for their service. I contacted BCH and explained my situation and they were very helpful and prompt in explaining what might be the problem, offering more than I expected. I very much appreciate what BCH had done for me and am completely satisfied with their service.
Jim
Happy Customer
So far happy with the help I have received from Kevin. I am currently converting an xp15000 for sublimation and paid for a subscription (bought my guards from him as well) and even though messaged him during a holiday the day after he got right back to me, which is hard to do for a small business. I know if I need more help he’s gonna help, that’s the kind of customer service I look for.
Sheree
Happy Customer
I have been able to depend on BCH for the past two years with parts, questions and guidance. I am so thankful I found them. I have had many times I just wanted to tossy printer out the window and BCH either had what I needed or guided me to what the problem could be. They are my go to for life.
Nikki
Happy Customer