

 Roll over image to zoom in
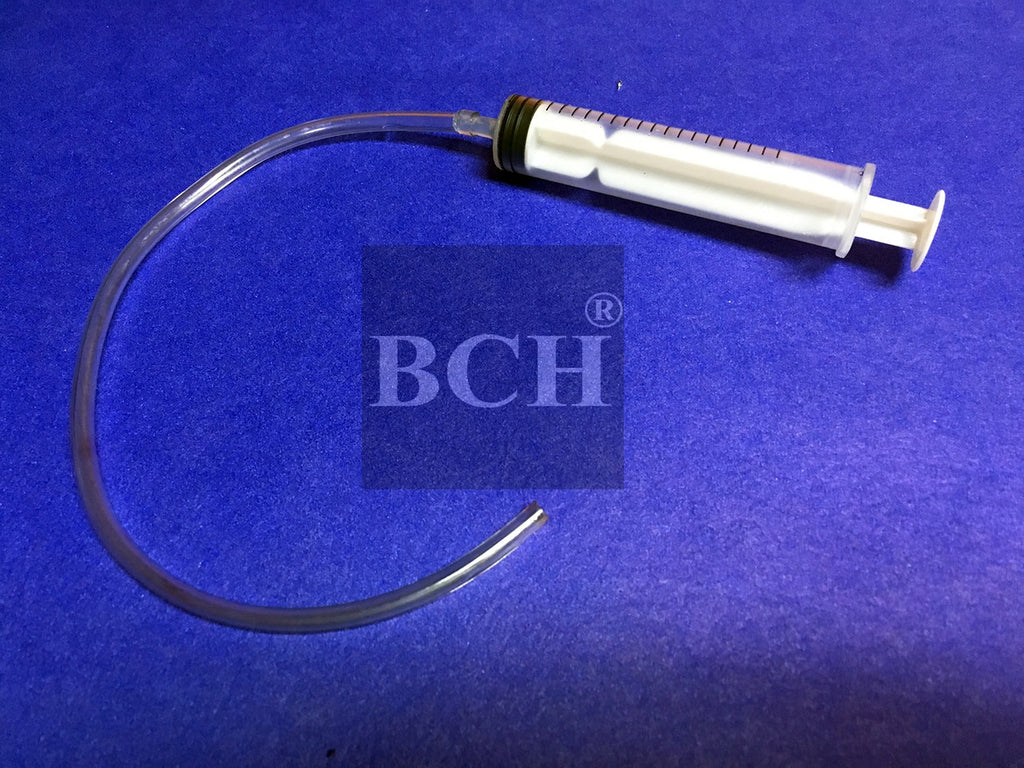
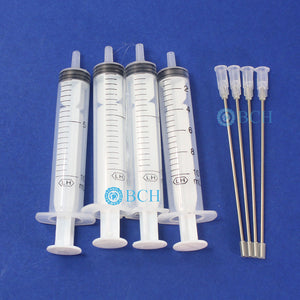
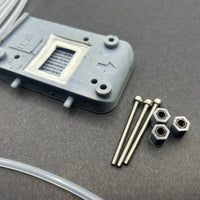
Unclogging /Flushing Syringe Tool for Epson Printhead with Nipples - Tight Fit Guranteed
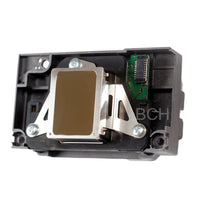
If your printhead has "nipples" (see picture), IT WILL FIT. 10 ml syringe with tubing for unclogging Epson printers Easy and simple unclogging procedure It's simple: just a syringe...
$7.99
SKU:
AS-SYUNCLOG-EP7
Categories:
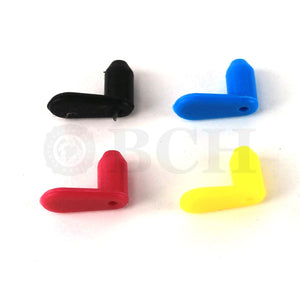
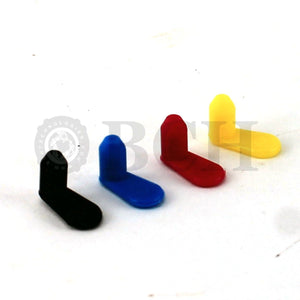
If your printhead has "nipples" (see picture), IT WILL FIT.
- 10 ml syringe with tubing for unclogging Epson printers
- Easy and simple unclogging procedure
- It's simple: just a syringe with a tube. However, our tubes are tested to fit tightly for Epson' ink intake.
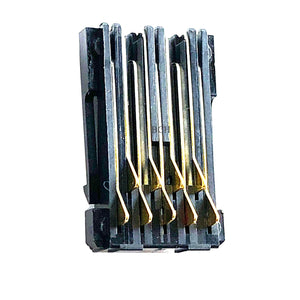
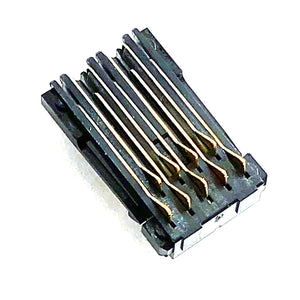
We guarantee a tight fit for all Epson printers have "needle" (aka, nipple) ink intake (see below for example). Most of Epson are this kind. The other kind is a big filter square, and you won't mistake it with the needle type.


Directions
1. Use the printer's built-in function to clean the printhead twice, then wait two hours and clean it twice again. If the problem persists, then we will need to use this tool.
2. Fill the syringe with water, ink (same ink as used in the cartridge), ink base, or cleaning solutions.
3. Power off the printer using the On button. As soon as the cartridge moves, cut the power off. In this way, the cartridge is not locked and can move freely inside the printer.
4. Tri-fold a paper towel and put in the middle of the printer and move the cartridge on top of it.
5. Insert the tube on the ink intake pin and push 5 ml of fluid through the printhead. You should feel the resistance similar to fill a water balloon, maybe twice as hard. However, do not push extremely hard so it may damage the internal structure of the printhead. Gradually push the fluid and do not let the fluid leak on the printhead platform.
6. Because the printhead is filled with cleaning fluid, you will need to run some built-in cleaning functions afterward. Do not exceed two cleaning cycles per two hours.
7. If the printhead is still clogged, we will need to seek professional help, such as steaming and ultrasonic cleaning (not for all printheads).
Related products
Add your product to the cart to view shipping rates. We've delivered to 289,762 customers in 149 countries.

Sign up for our newsletter to get weekly coupons and tips on printer refills and repairs.
Got a question? Don't hesitate to email us at support@bchtechnologies.com
Subscribe to Kevin's YouTube channel for the latest tips on printer repair and maintenance.
Recently viewed


I purchased this product and messed it up first time. I somehow got superglue onto the main circuit board on the colour cartridge and for some reason (not sure how) I messed up the black one too. I repurchased the product (x2). I tried again with the colour one first (which is meant to be the most difficult). I was careful to wrap the circuit board and print head in cling film and taped it down on top. I was careful with the superglue and let it dry upside down for 24 hours so that if the glue leaked anywhere it wouldn't go towards the circuit board. It works great. I now have a functioning refillable colour cartridge. I am glad I got the hardest one out of the way first. I will shortly try the black one. But fantastic that overall, I know this product will save me a fortune in printing now. The colour one is obviously the hardest and it works! Good job guys. (I am from the UK which is why we spell colour with a u lol).
Daniel Cunningham
Modification Kit for Making Spongeless Cartridge with Canon PG-210 CL-211 PG-240 CL-241 PG-245 CL-246 PG-243 CL-244 PG-260 CL-261 PG-275 CL-276

The Tubes Were Great! I Love The New Tubes! They Worked Out Perfectly! I Will Be Purchasing Other Items In Your Store. BCH You Are Awesome!!! Keep Up The Good Work!
Stevie Johnson
[C2] 3FT 1.8MM ID 8-Strand Solvent Ink Tubing for Color & White DTF Tube Large Format Printer CIS
I purchased this product and messed it up first time. I somehow got superglue onto the main circuit board on the colour cartridge and for some reason (not sure how) I messed up the black one too. I repurchased the product (x2). I tried again with the colour one first (which is meant to be the most difficult). I was careful to wrap the circuit board and print head in cling film and taped it down on top. I was careful with the superglue and let it dry upside down for 24 hours so that if the glue leaked anywhere it wouldn't go towards the circuit board. It works great. I now have a functioning refillable colour cartridge. I am glad I got the hardest one out of the way first. I will shortly try the black one. But fantastic that overall, I know this product will save me a fortune in printing now. The colour one is obviously the hardest and it works! Good job guys. (I am from the UK which is why we spell colour with a u lol).
Daniel Cunningham
Modification Kit for Making Spongeless Cartridge with Canon PG-210 CL-211 PG-240 CL-241 PG-245 CL-246 PG-243 CL-244 PG-260 CL-261 PG-275 CL-276