Downloadable 4-Color Ink Purge Files for HP and Canon- Help Unclog and Clean Printhead Nozzles
$3.99
Ink purging is a more gentle and non-intrusive method than flushing or printer's built-in cleaning function. The technique is commonly used when a mild clog is starting to develop. Only for HP and Canon. We do no recommend this product to be used on Epson or Brother because they have a different printhead type. We have another product that works on Epson and Brother.
About the Files:
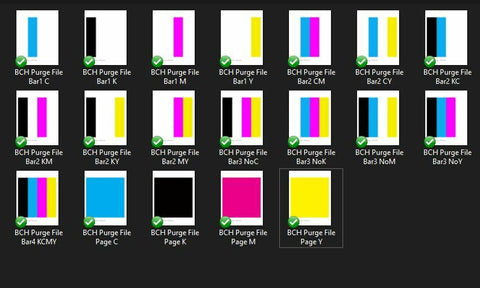
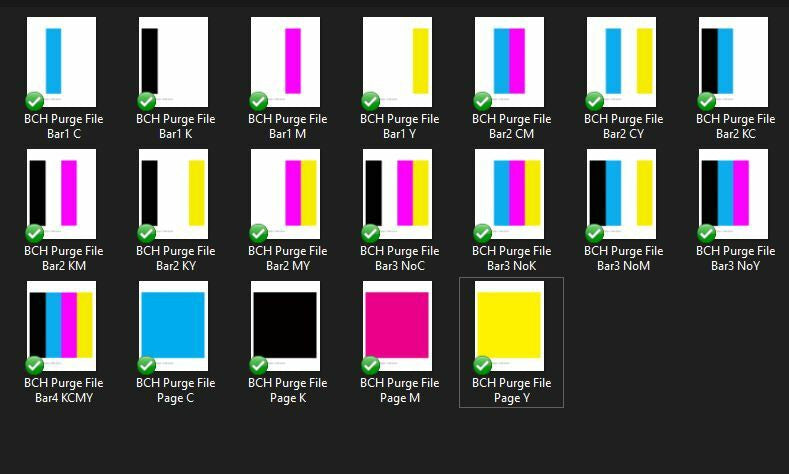
These files are designed to help unclog and clean printhead nozzles by purging the color ink. Nineteen complete and individual printer purge files can flush a printer and target individual channels/colors without cleaning cartridges.
- 4 full-page files (Page) for a deeper purge
- 4 Single Bar files (Bar1) for quick purging with minimum stress to the printer
- 6 Double Bar files (Bar2) for two-color purging
- 4 Triple Bar files (Bar2) for three-color purging
- 1 Four Bar files (Bar4) for all four colors
The files are provided with a larger zip (for Windows) as well as individual files for Mac download.
Instructions for Using Printer Purge Files to Clear Printer Blockages:
Printer purge files are a handy solution to clear blocked colors on your printer without resorting to using up excessive ink with repeated head cleaning cycles. Follow these steps to use printer purge files effectively:
1. Identify the Blocked Colors:
- Before you begin, determine which color(s) on your printer are blocked, causing print quality issues. You can often identify this by examining a nozzle check, which may show missing colors or streaks in specific areas.
2. Download the Printer Purge Files:
- Visit the bchtechnologies.com and download the purge files. Those files are in tif image format.
3. Prepare Your Printer:
- Make sure your printer is powered on and properly connected to your computer. Ensure that you have sufficient paper and ink cartridges installed.
4. Select the Appropriate Purge File:
- Choose the printer purge file that corresponds to the color(s) that need clearing. These files are typically designed to focus on individual colors or specific combinations.
5. Load the Purge File:
- Open the purge file using your preferred image-viewing software.
- Send the file to your printer for printing. Make sure to select the correct printer and paper settings to match the file and your printer's specifications.
6. Start Printing:
- Initiate the printing process. The purge file will consist of solid colors or color combinations, which will help clear the blocked ink in the selected areas.
7. Observe the Results:
- Examine the printed output for improvements in the blocked colors. The purge file should help unclog the blocked nozzles and restore print quality.
8. Repeat if Necessary:
- If the blockage persists or if you have severe blockages (missing colors consistently), consider a combination of using purge files and a printer cleaning solution like Magic Bullet Print Head Cleaner for a more thorough cleaning.
9. Cleaning with BCH Print Head Cleaner (Optional):
- If severe blockages persist, you can use a printer cleaning solution like BCH Red Cleaning solution to purge files. We have three levels of cleaning solution, from clear to green (more potent) to red (max strength).Dependingon your clog,you may not start with the strongest right away.
- You can add the cleaning solution to a cartrige and make it a "cleaning cartridge", keep purging the printer, or use a tool to inject the solution directly to the printhead (more intrusive) and thus soften the clog.
10. Continue Printing:
- Once you have successfully cleared the blockages using the purge files and, if needed, the cleaning solution, resume your regular printing tasks.
Remember that using printer purge files is a more targeted and efficient way to address specific color blockages without wasting excess ink. It's essential to use the correct purge file for the color(s) that require cleaning to maximize the effectiveness of this method.
Related products
Complete Your Purchase
Categories
Add your product to the cart to view shipping rates. We've delivered to 289,762 customers in 149 countries.

Sign up for our newsletter to get weekly coupons and tips on printer refills and repairs.
Got a question? Don't hesitate to email us at support@bchtechnologies.com
Subscribe to Kevin's YouTube channel for the latest tips on printer repair and maintenance.
Recently viewed

Yes, you can easily make your own with a washed out water bottle but these come ready to go and are a better quality plastic. I won’t be using mine as a waste tank since I have a my CISS but will be using the bottle for my maintenance and cleaning solutions.
David Sustaita
XLARGE Waste Ink Collection Tank Combo with Small Tube for Epson (AS-EP-WASTE-25MM)

I can’t say enough about this company! Sent my main board in for repair and they were fast and the cost was reasonable. They are also quick to respond. This is not the first item I’ve purchased from them and won’t be the last. Also, the YouTube videos are a must to watch!
Nancy Donaldson
Fast Track Mainboard Repair: L1800, XP-15000, ET-15000, WF-7610 7620, WF-7110, WF-7710 7720, ET-8550, ET-2720, ET-2750Printer Mainboard, Formatter Board, Motherboard Troubleshooting and Repair

I have an old Epson ET-2750 eco tank printer, which I have used for years, and since it is uses refillable ink tanks, have used very little ink over the years. I love this printer because I can print lots and lots of pages, including double-sided at very low cost, and it is very reliable. I recently had a paper jam, which is very unusual. When I took off the back panel to clear the jam, I accidentally dropped it on the floor, and when I replaced the back panel, the printer jammed every time I tried to print double-sided. I found a small plastic piece on the floor that fit on one end of the roller, but didn't realize I was missing the other end. I eventually noticed that there was a gear on the back panel next to where the roller fits into the panel. I deduced that I must be missing a gear to pop into the end of the roller, to mesh with the gear on the panel. I couldn't find the missing gear anywhere, and figured my cats must have lost it or my wife might have swept it up when sweeping the floor, and discarded it. Through a Google search, I found BCH Technologies, ordered the part from them, it fit perfectly, and now I can print double-sided again on my faithful old Epson printer. I very much appreciated being able to get the missing part from them. I thought the price for the part and shipping was high for such a small part, but that was the only down side.
Daniel Parker
Duplex Roller Feed Gear for Epson Printers

